Airstreams Are Cool. Coffee is Cooler. Cancer Sucks.
Category: Coffee Airstream
UPDATE: Well, the Airstream Coffee shop idea fizzled out. We were open for over a year but due to numerous unfortunate circumstances that happened during build out and later after opening, we had to close it up. Starting a business with 4 kids and on the cheap is extremely difficult. The Airstream has been sold to a party in West Hollywood, so keep an out for it down in the LA area.
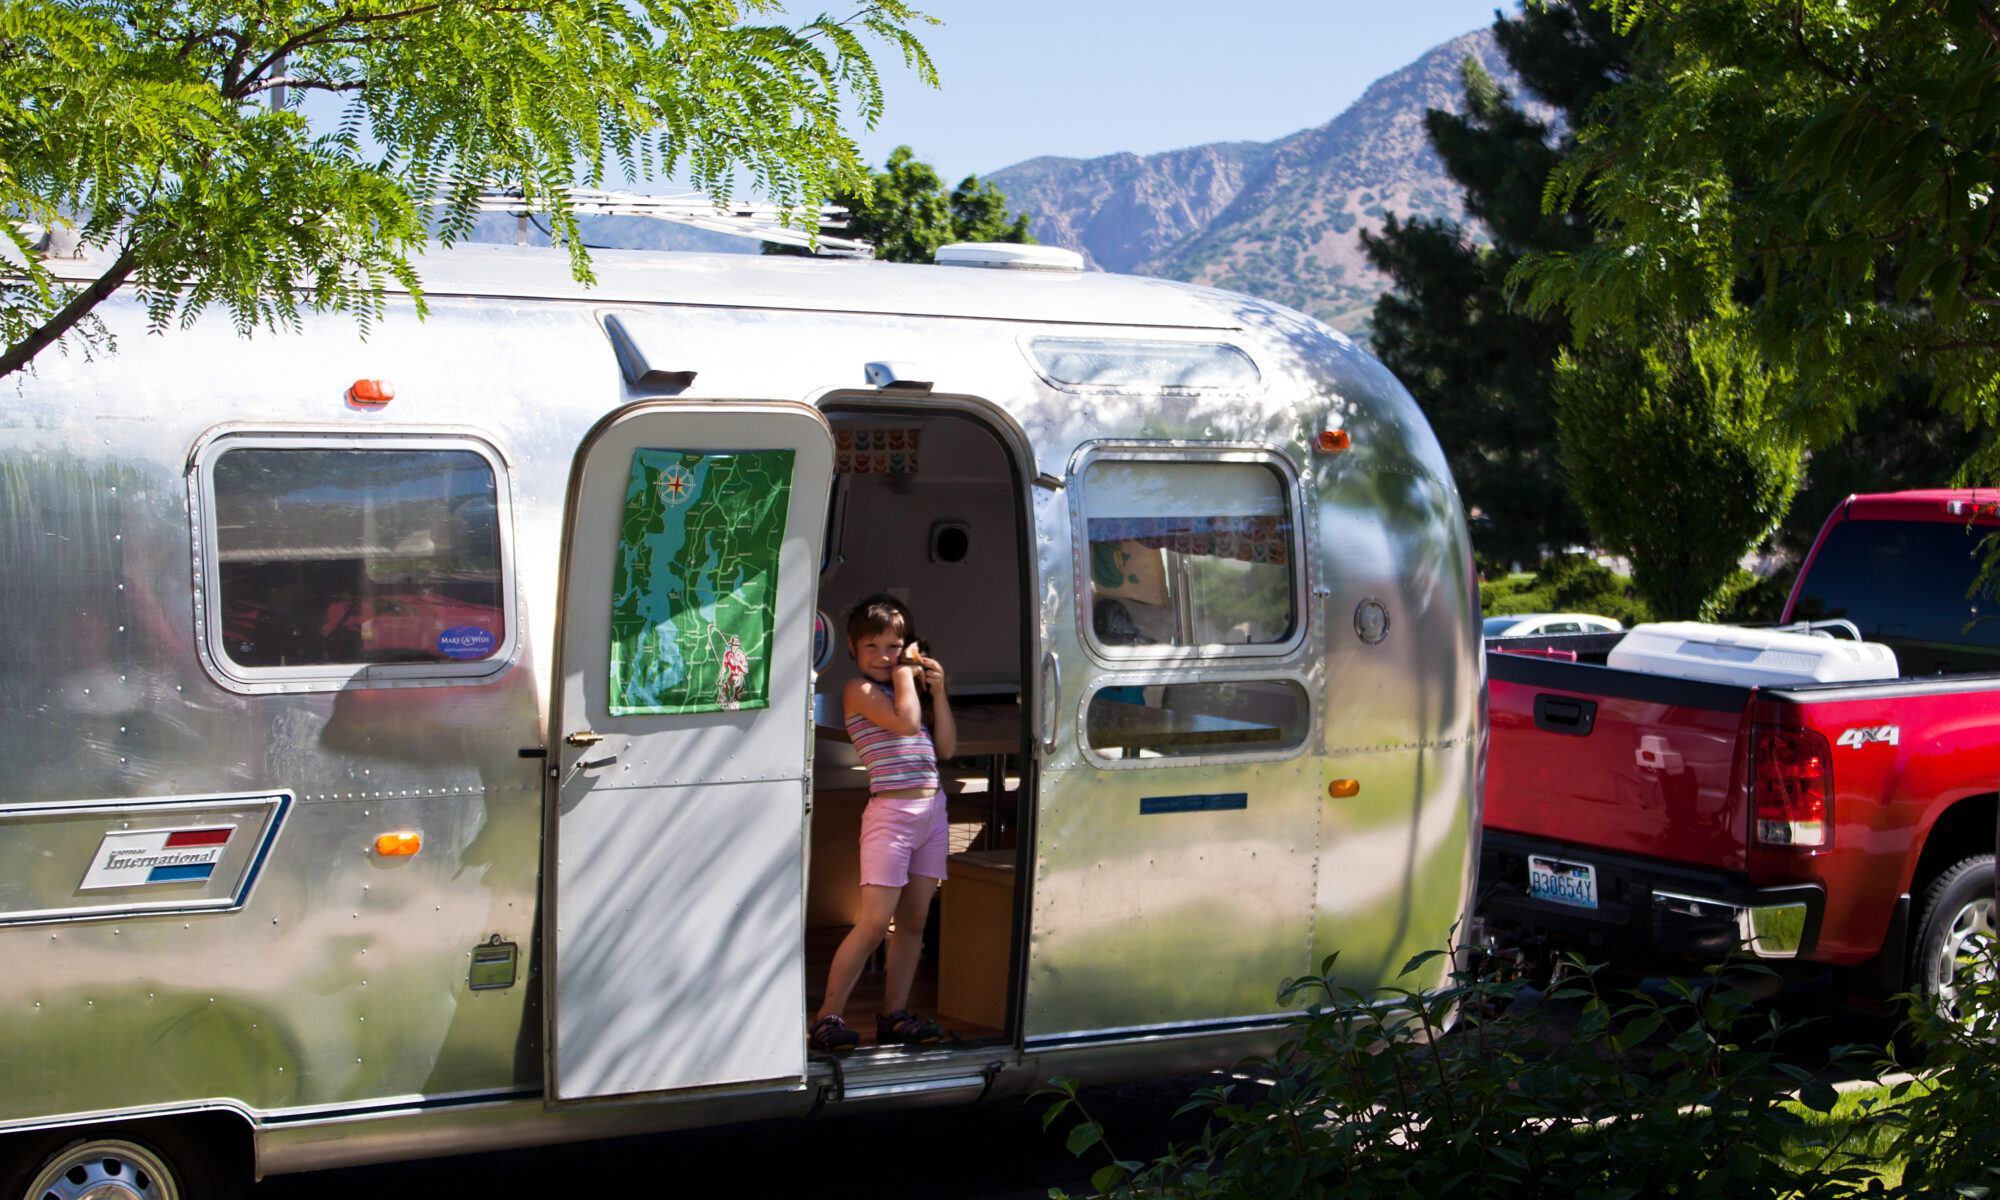
One of Miette’s other wishes was for us to have our own coffee shop. She settled for an Airstream. But, our family loves coffee and now we are Airstreamers, so it was fitting that when I (Kelly) became unemployed recently that we try something new. This page is a documentation of our process of renovating an Airstream. Actually, it would be considered a conversion, since we are converting this 1964 Airstream Sovereign to a mobile coffee cafe. Regardless, there are many things that were and are being done during this process and I figured putting them up here might help others while they are working on their Airstreams.
UPDATE (2/28/2020): The coffee Airstream has been SOLD.
Wow… didn’t realize how long its been since doing a post here! Time goes by so fast!
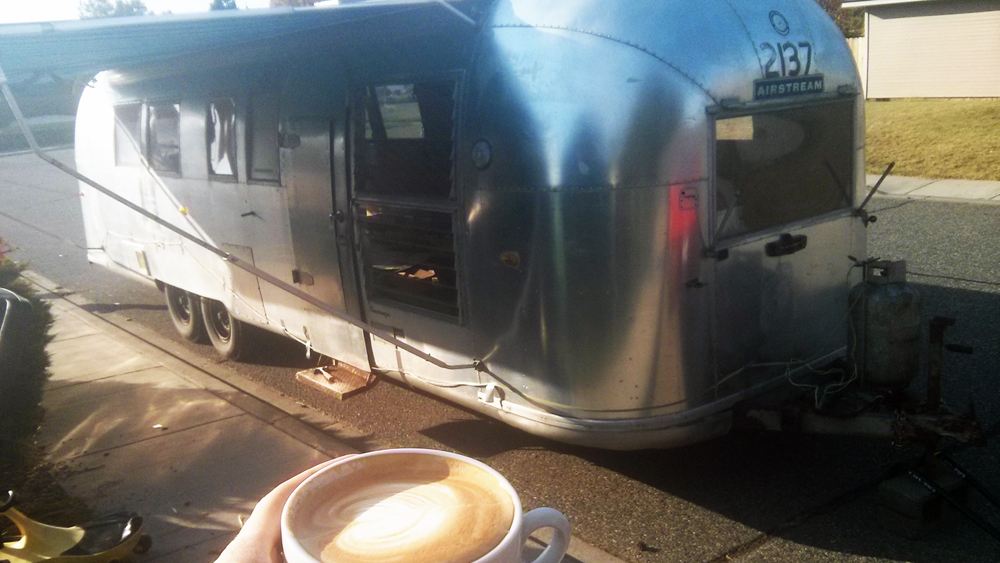
Anyway, just wanted to say that the Airstream that I converted to a coffee shop, and later had to sell, is back up for sale by the new owner. They never were able to finish their plan of a coffee shop in the Ventura area. It’s been sitting down there, unused for a couple years.
As a quick summary…
It has all the equipment needed to just open. The main attraction, besides it being a beautiful 1964 Airstream Sovereign Land Yacht, is the Slayer espresso machine. The design was inspired by the front of an Airstream, with rivets and all! Check it out and pass the link along to those whom you think could be interested. I’d love to see this open again and being enjoyed somewhere. It’s currently in Southern California, in the Los Angeles area.
Well, as you can see, I haven’t been keeping up with the documentation of the remodel of the 1964 Airstream Sovereign that we converted to a coffee shop. Starting a business was hectic. Remodeling an Airstream and starting a business was even more hectic; so the documenting of the remodel fell to the wayside. I do have photos and hope to put something together up here showing the process after the fact. But until then, you can check out the finished work at stromcoffee.com.
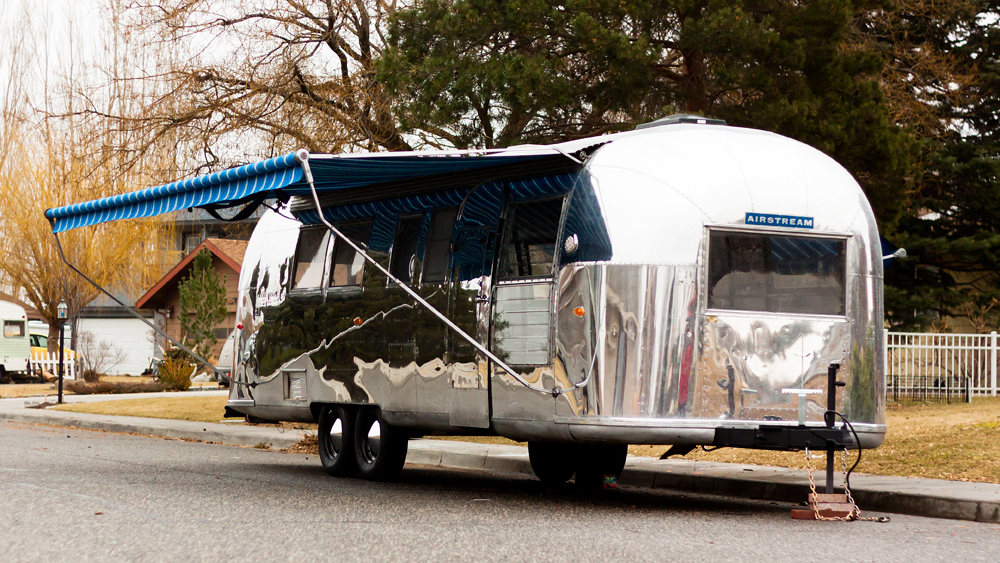
Ström Coffee’s 1964 Airstream Sovereign.
We are really pleased with how well the Airstream turned out. It’s an eye catcher for sure. We also had an espresso machine designed after the Airstream. You can see that here. The crafts people at Slayer Espresso did a great job with the aluminum.
So… hopefully more to come at a later date. Running a coffee shop is time consuming 😉
Like most people who just acquired a vintage Airstream, I spent time envisioning what it would like when it was done. Shiny, mirror like polishing, new tires, wheels and hub caps, new lights, new windows, designer interior, gold plated steps, diamond studded this, ruby studded that. It was going to be grand.
But first, a cup of coffee to get started.
Having some thinking juice while looking things over
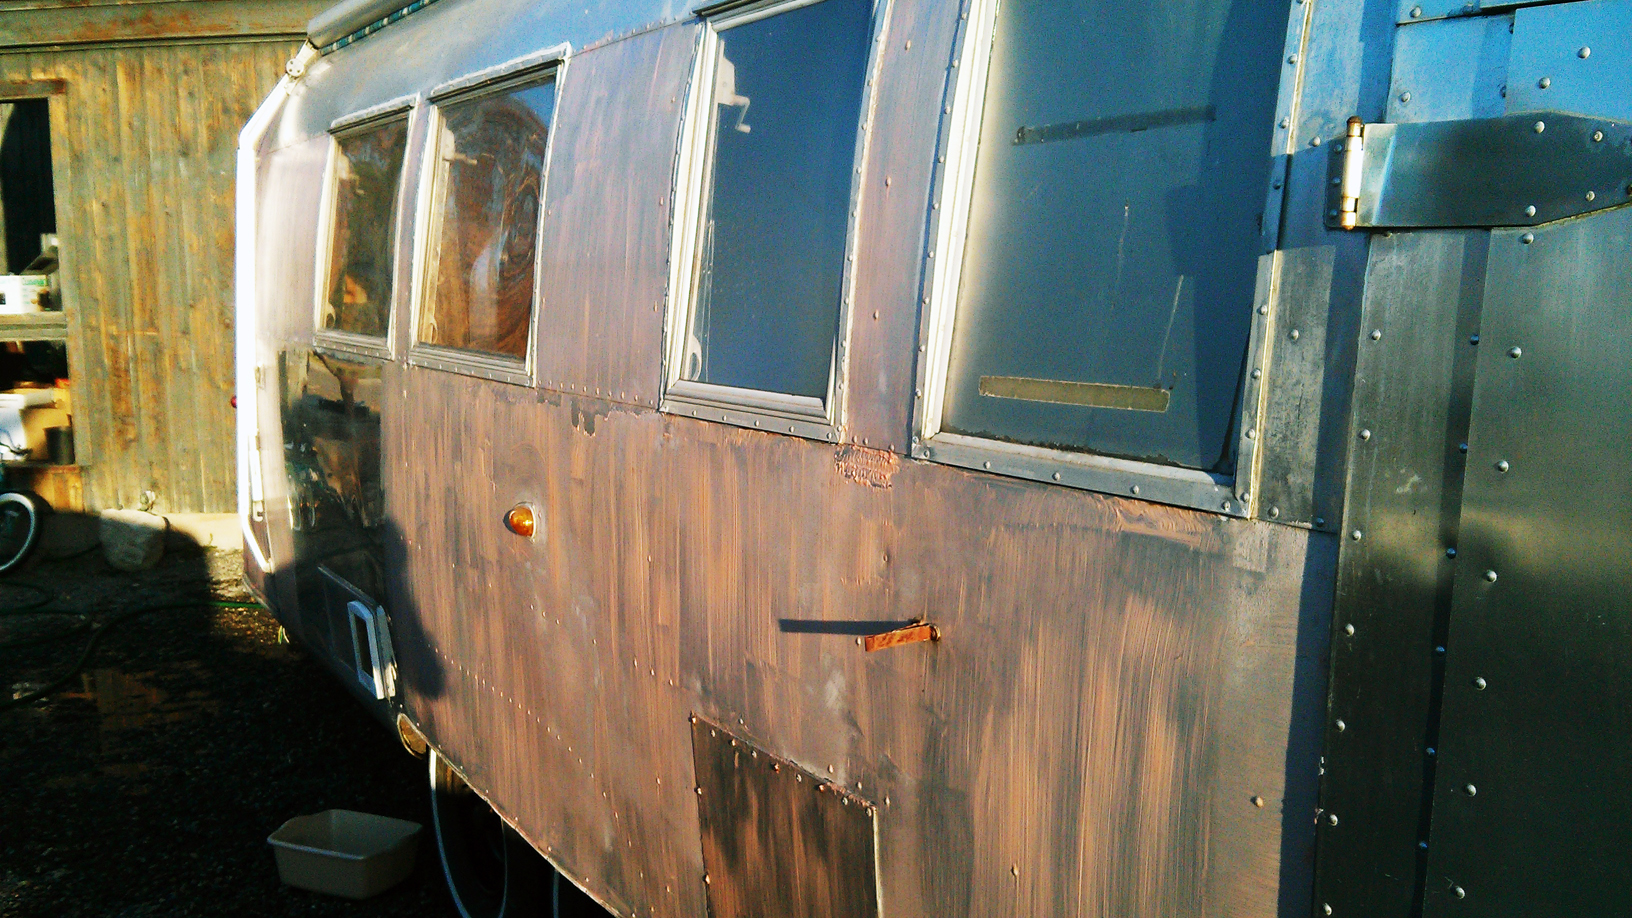
Stripping Off The 50 Year Old Look
Where to begin. I knew I was needing to find a shop to park this in so I could remove and keep material protected from the elements. It was October and the weather was going to be turning any day and renovating outside wasn’t an option. So until I found a suitable shop everything I was going to do at the house would be exterior stuff. I started with stripping things off the exterior and getting ready to strip the clear coat off. Before polishing, the 50 year old clear coat needs to be stripped off to get to bare aluminum. But before using stripping agents, the entire Airstream needed a good bath with a good scrubbing. I used a pressure washer to remove a thin layer of green haze that old trailers on the west side of the mountains tend to develop. After the bath I began to strip it. I tried three different stripping products: Citris Strip from Home Depot, Eldorado PR-5044 (from Vintage Trailer Supply – VTS) that we had left over from Miette’s Airstream work and finally the nasty stuff; Aircraft Paint Remover that I got from AirstreamSupply.com (they used to be in Auburn, Washington but moved to Utah).
This is the Citris Strip.
Citris Strip is the most non-toxic of the three but the least effective. It stripped, don’t get me wrong, but some spots it didn’t touch and it needed to be left on for 2-4 hours (I washed areas off before 2 hours and it wasn’t stripping it). The Eldorado stuff was next best in effectiveness but it missed some spots too but didn’t need to be left on as long; maybe 30 minutes? The Aircraft Paint stripper was the fastest (visibly dissolved the clear coat in 15 minutes) and most effective but also the most toxic. We don’t like toxic. Thankfully, 90% of the clear coat I was able to remove between the two others and only had to use a small amount of the toxic stuff to get the stubborn areas. I could have saved a whole bunch of time by using the Aircraft stripper, but having a cancer surviving daughter, toxic stuff just isn’t in the cards anymore. I spent a couple days between using each stripper product and washing the Airstream. It took longer than I wanted.
Most people say to remove the plastics before stripping but I didn’t. I was replacing all the exterior lights anyway so I left them on. The windows were made of Plexiglas which I was going to change out to tempered glass so I didn’t bother to mask those off.
Polishing – Which Method?
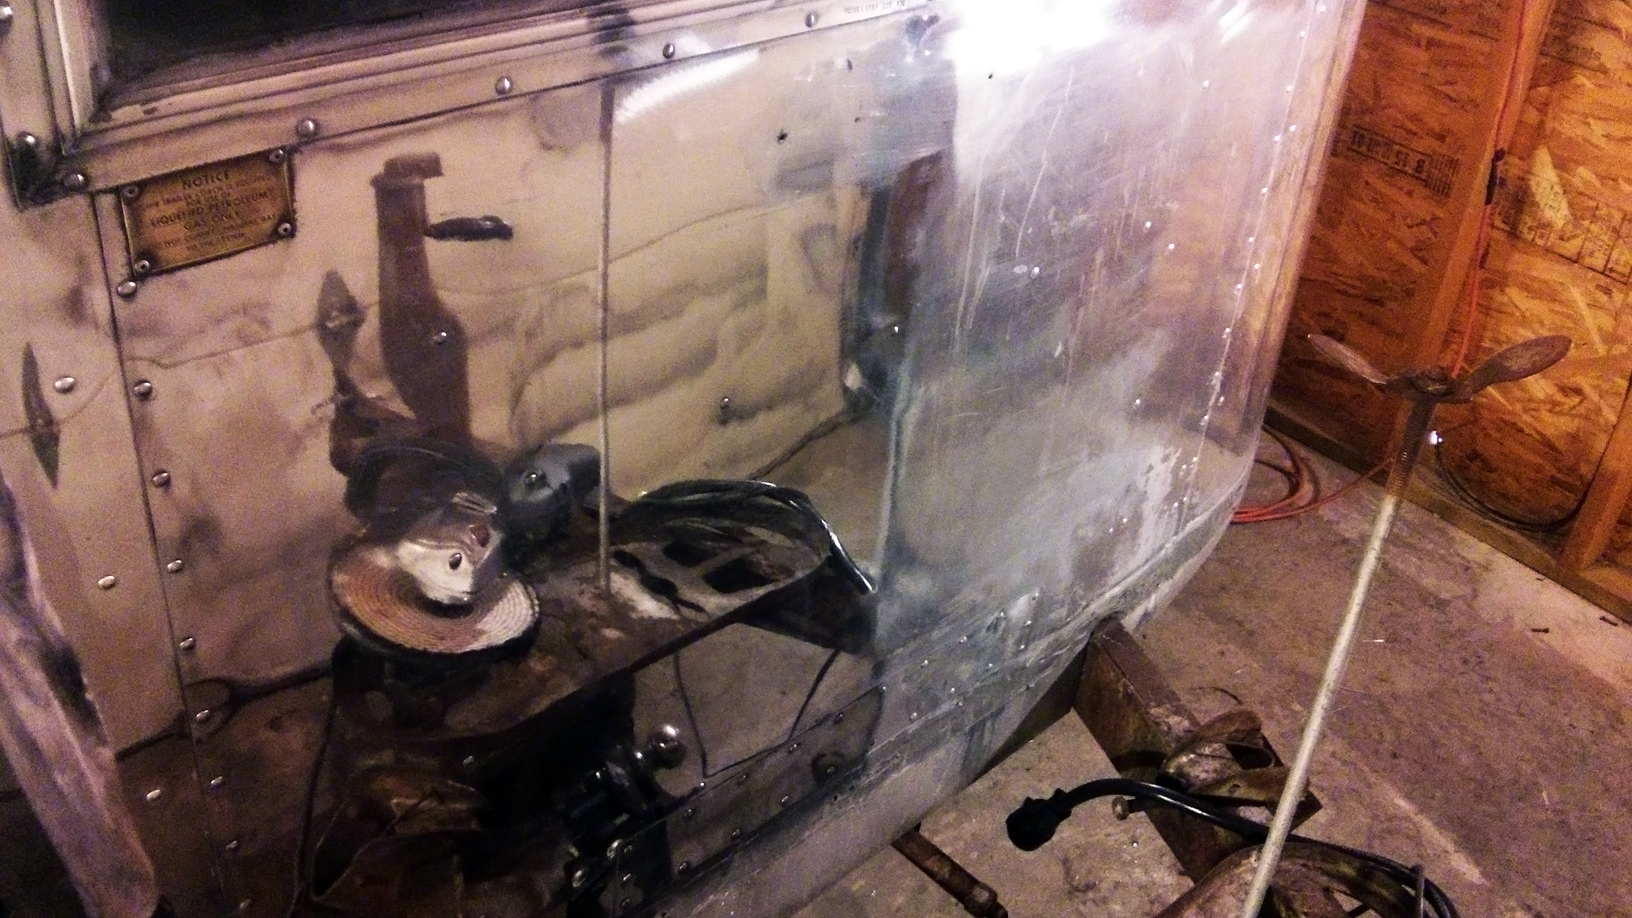
Most people save the polishing for last since there will be exterior skin work that needs to be done during a restoration project. However, for the weather reasons stated above, I started on the exterior first. There seems to be two ways of polishing a vintage Airstream: the “Perfect Polish” or the “Black Bar” method. I won’t go into a ton of detail on how to do each one (there are a lot of other websites and posts on Airforums.com describing the details of each method) but I will say I used a hybrid approach after trying the Perfect Polish only method. I started with using Nuvite F7 and the wool bonnet. That was not taking off some of the stubborn spots. It was bugging me, seeing some splotchy areas in addition to it taking a long time just to try and get those splotchy areas less… splotchy. So I ordered some F9 and tried that. Not much a difference and it still took a long time. Then I went to Harbor Freight, grabbed an 8″ spiral buffing wheel and a bar of brown polish compound. I used the buffing wheel on the polisher with the brown stick and wow… what a difference. It covers less area at a time compared to the wool bonnet but it cuts through the metal much faster. I did two passes with the buffing wheel method compared to over and over and over and over with the F7/9 and wool bonnet. I’m sure there are better products to use than what I got at HF, but using the buffing wheel method as the first step is superior in my mind.
This is after two passes with the buffing wheel. It would’ve taken me twice as long with the wool bonnet and F9
Once the first initial cut is done and you can get to the clean, raw aluminum (the first pass creates a reflection – granted, with an ugly pattern in the sunlight) then the Nuvite F7 does much, much better and goes faster. Then, after the F7 I went to the C and then on to the S. So the process I used: Black (or brown) Bar –> F7 –> C –> S. Don’t worry that there’s 4 steps in there compared to the 3 steps for the Perfect Polish method… it was still faster. I’m not gonna say my polishing job was really great; I couldn’t spend a great deal of time on it since I need to get this Airstream completely renovated and converted in a matter of 3 or 4 months. But I’m satisfied. Better products than HF should give better results as well. I’ve read that Fastenal has good cotton buffing wheels. I will know what to do for Miette’s Airstream polishing job now.
This is before the final S polishing
Of course, I found all the polishing stuff out through the 3 months of polishing on and off (this blog won’t be an exact chronological description of the process. I’ll jump around a bit). I will say polishing in the cold isn’t doable. The metal is cold and is harder to cut. The warmer the metal is the easier it is to cut. So I polished outside, in October and November except on the really cold days. If it got below 50° I bailed on the polishing.
So there’s my version of the polishing method. I”m sure others have figured out something similar using the two methods. I can say this after finishing the polishing… renovating an Airstream is WORK.
One of the first orders of business, when one decides to open up a coffee shop in an Airstream, is to acquire an Airstream. That we did. We had been searching for a while and waiting for a decent one to come up for sale which was in our price range. We found a 30′ 1964 Airstream Sovereign in Port Townsend, Washington on Craigslist for $2,300. That would be a 5 hour drive. So my dad and I rose early in the mornin’ and took off for Port Townsend. Yep, just like that. I pressed that button. 5 hour trip to buy a $2,300 fifty year old trailer sight unseen and drive it back? No problem. Just to compare, I’ve spent days… DAYS researching what dishwasher to buy and becoming completely indecisive about it. DAYS, I said. Well, not this time. I have a plan.
The Condition
We got there about 1pm. The body was in pretty good shape except for some dents in the back above the bathroom window. It was already gutted, which saved some time. The floor material was in decent shape but it was old and the strength was fading. No floor rot or mold anywhere for the most part, which was surprising for it being a western Washington Airstream. The tongue was rough, but it could be cleaned up. No lights worked: running lights, brake lights, marker lights… nothing. I bought a cheap set of magnet towing lights at Harbor Freight with knowledge that the lights didn’t work. There were no holding tanks, no drain pipes, no water pipes. The vents were all goners. The glass in the windows had been replaced with Plexiglas (Apparently the original windows were not tempered glass and broke easy). The jalousie window next to the door was froze up and wouldn’t open or close. The interior skin was rough.
The interior
This was a 50 year old trailer and it showed. But this was expected. I planned on replacing almost everything I could, except for the exterior skin and the frame. There was one other Airstream that we thought about that wasn’t gutted and needed just as much work. That was going for $2,000 in Tri-Cities. That one wouldn’t roll without replacing wheels and tires. The only other vintage Airstreams that were close to our budget were in Montana, southern Idaho or western Oregon. None of them were under $3,000 so this was really a good deal.
So here we were, in Port Townsend, looking at a 50 year old trailer that we needed to drive 5 hours. The tires looked very, very, very, very old. It had split rims. That means they are very old as well. The tires had cracks (a lot) in them. That wasn’t a good sign. I debated stopping by a tire shop in Bremerton before making the long trek back. However, delays prevented that possibility so we ended up going for the 5 hour trip, hoping the axles, wheels and tires could survive it.
Oh boy. The rims look original. The tires can’t be but, man, do they look old.
Delays, Delays, Delays
The first delay was my fault. I knew the 60’s Airstreams required a 2″ ball instead of the 2 3/8″ ball. But I never moved the 2″ ball to the receiver before we left. I was bright enough to throw the 2″ ball in the truck though. I brought tools, but not a pipe wrench. Thankfully the seller’s neighbor had a couple so we got that taken care of.
Hitched up and (almost) ready to go, once the lights start working.
The next delay was much longer. About 2 hours. The magnet lights weren’t working quite right. The signaling was all messed up, even though we had it hooked up correctly. We tried swapping out connectors, wires, lights testers, etc. Ended up taking it to a Uhaul down the road and they helped us fiddle with it as well but still couldn’t get it to work. Afters 2 hours I decided to try a thicker gauge wire and it worked. The problem was, those magnet lights were only long enough for a 20 foot trailer so I bought an extra length set to use them on the 30 foot Airstream. So they used a gauge of wire just thick enough for 20 feet and that’s it. Found that out the hard way. Don’t extend the wiring of magnet lights while using their original gauge. 20 feet means 20 feet. Ok, got it. Finally, around 6pm, we were on the road back home.
Fueling up on the other side of the Hood Canal bridge. And no, I don’t love the cat door.
Good Job, 50 Year Old Airstream
The trip home was pretty boring, which was good. I only went 60 mph the whole way back though. Wow, that was a long trip compared to 75 mph. It was a long, stressful day but we made it home. No blowouts, no axles breaking. Its a 50 year old trailer. Name another 50 year old trailer that can make a 350 mile trip with mostly original everything. Probably can’t. All was good.