Airstream Renovations With Bunk Beds

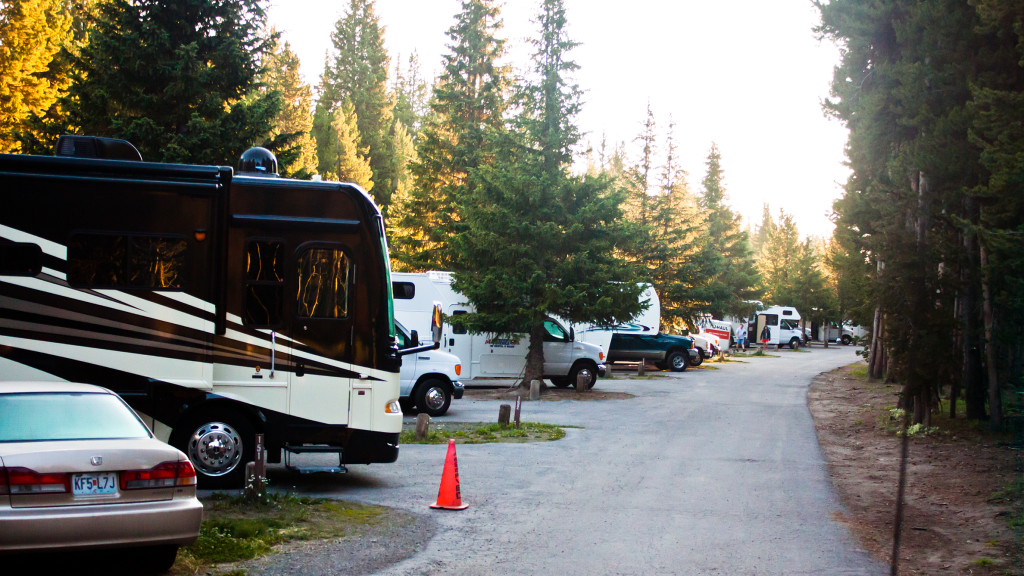
Ah, the sleeping spot dilemma during an Airstream renovation project. You’re in the middle of renovating an Airstream (or a travel trailer in general) or thinking about which size of Airstream to buy so you can fit your family of 4, 5 or even 6. Where is everyone going to sleep? “The original design isn’t going to work” you say. So you ask yourself, “should we install bunk beds”? Thanks to our daughter, we’ve had the privilege to enjoy the ways of the Airstream life, even it was just for a bit. But spending a month straight in one gave us time to evaluate the layout for larger family. Based on that month long evaluation period, the following is what we’ve noticed. This article is geared towards Airstreams, but If you’re thinking about different layouts for a travel trailer in general, this article applies just as well.

To Bunk or Not to Bunk

Quite honestly, bunk beds are the way to go for Airstreamers with children, especially those who are going full-time with Airstreaming or RVing in general. Living (permanently or temporarily) in an Airstream or RV could be really fun, really bad or somewhere in the middle… depending on the layout of the sleeping quarters. If you’re in the middle of restoring or remodeling your vintage Airstream and deciding on custom building or having some custom built beds, you should really figure out how and where you want your family situated every night. Where will the kids sleep?

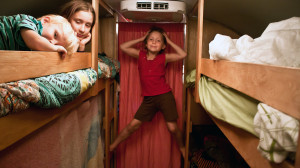
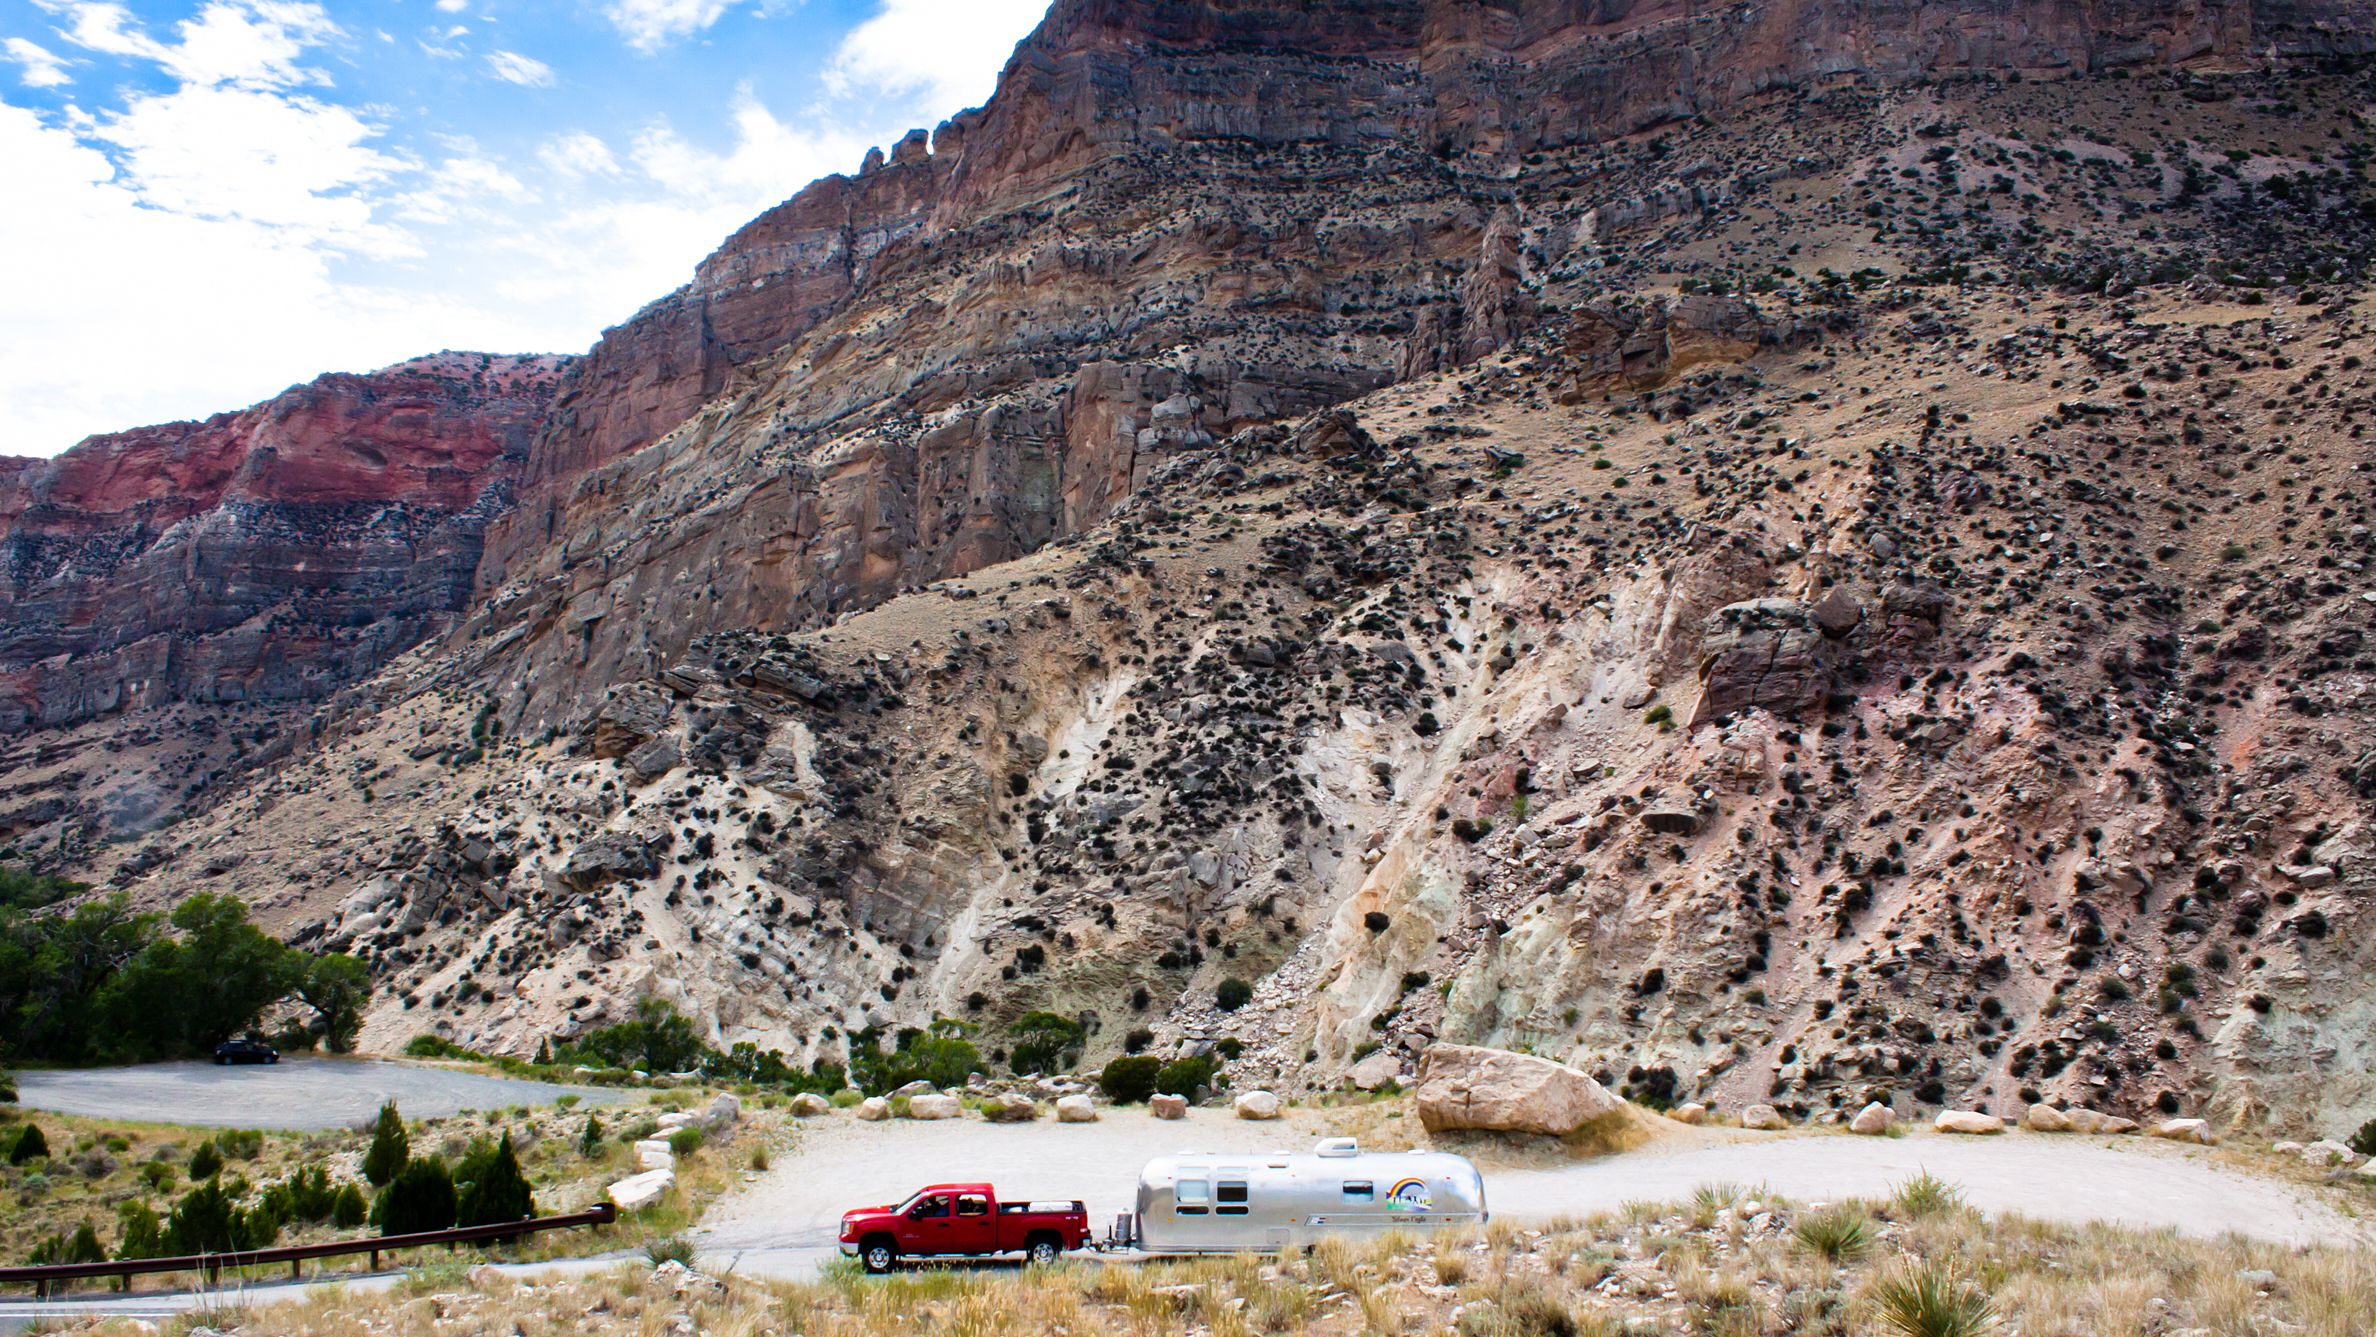
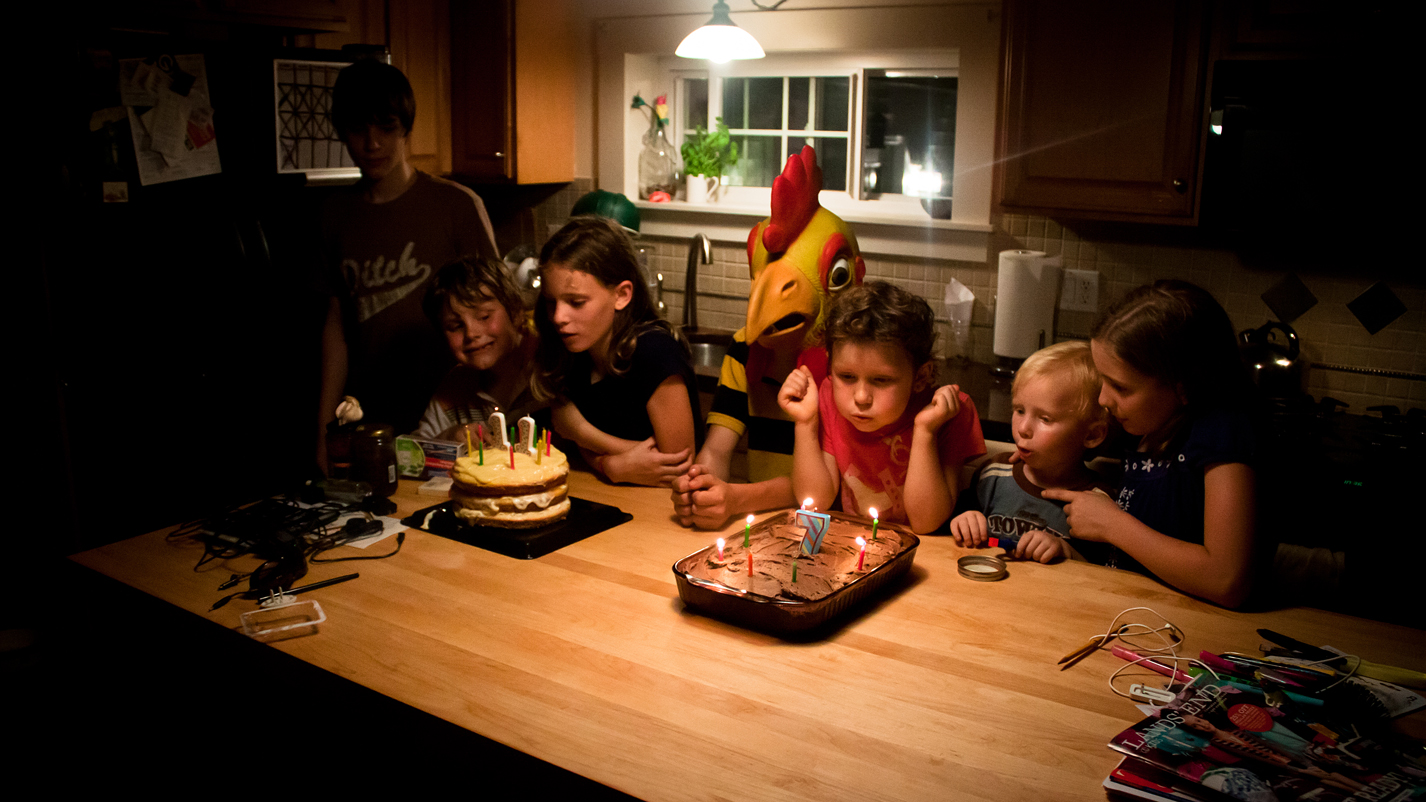
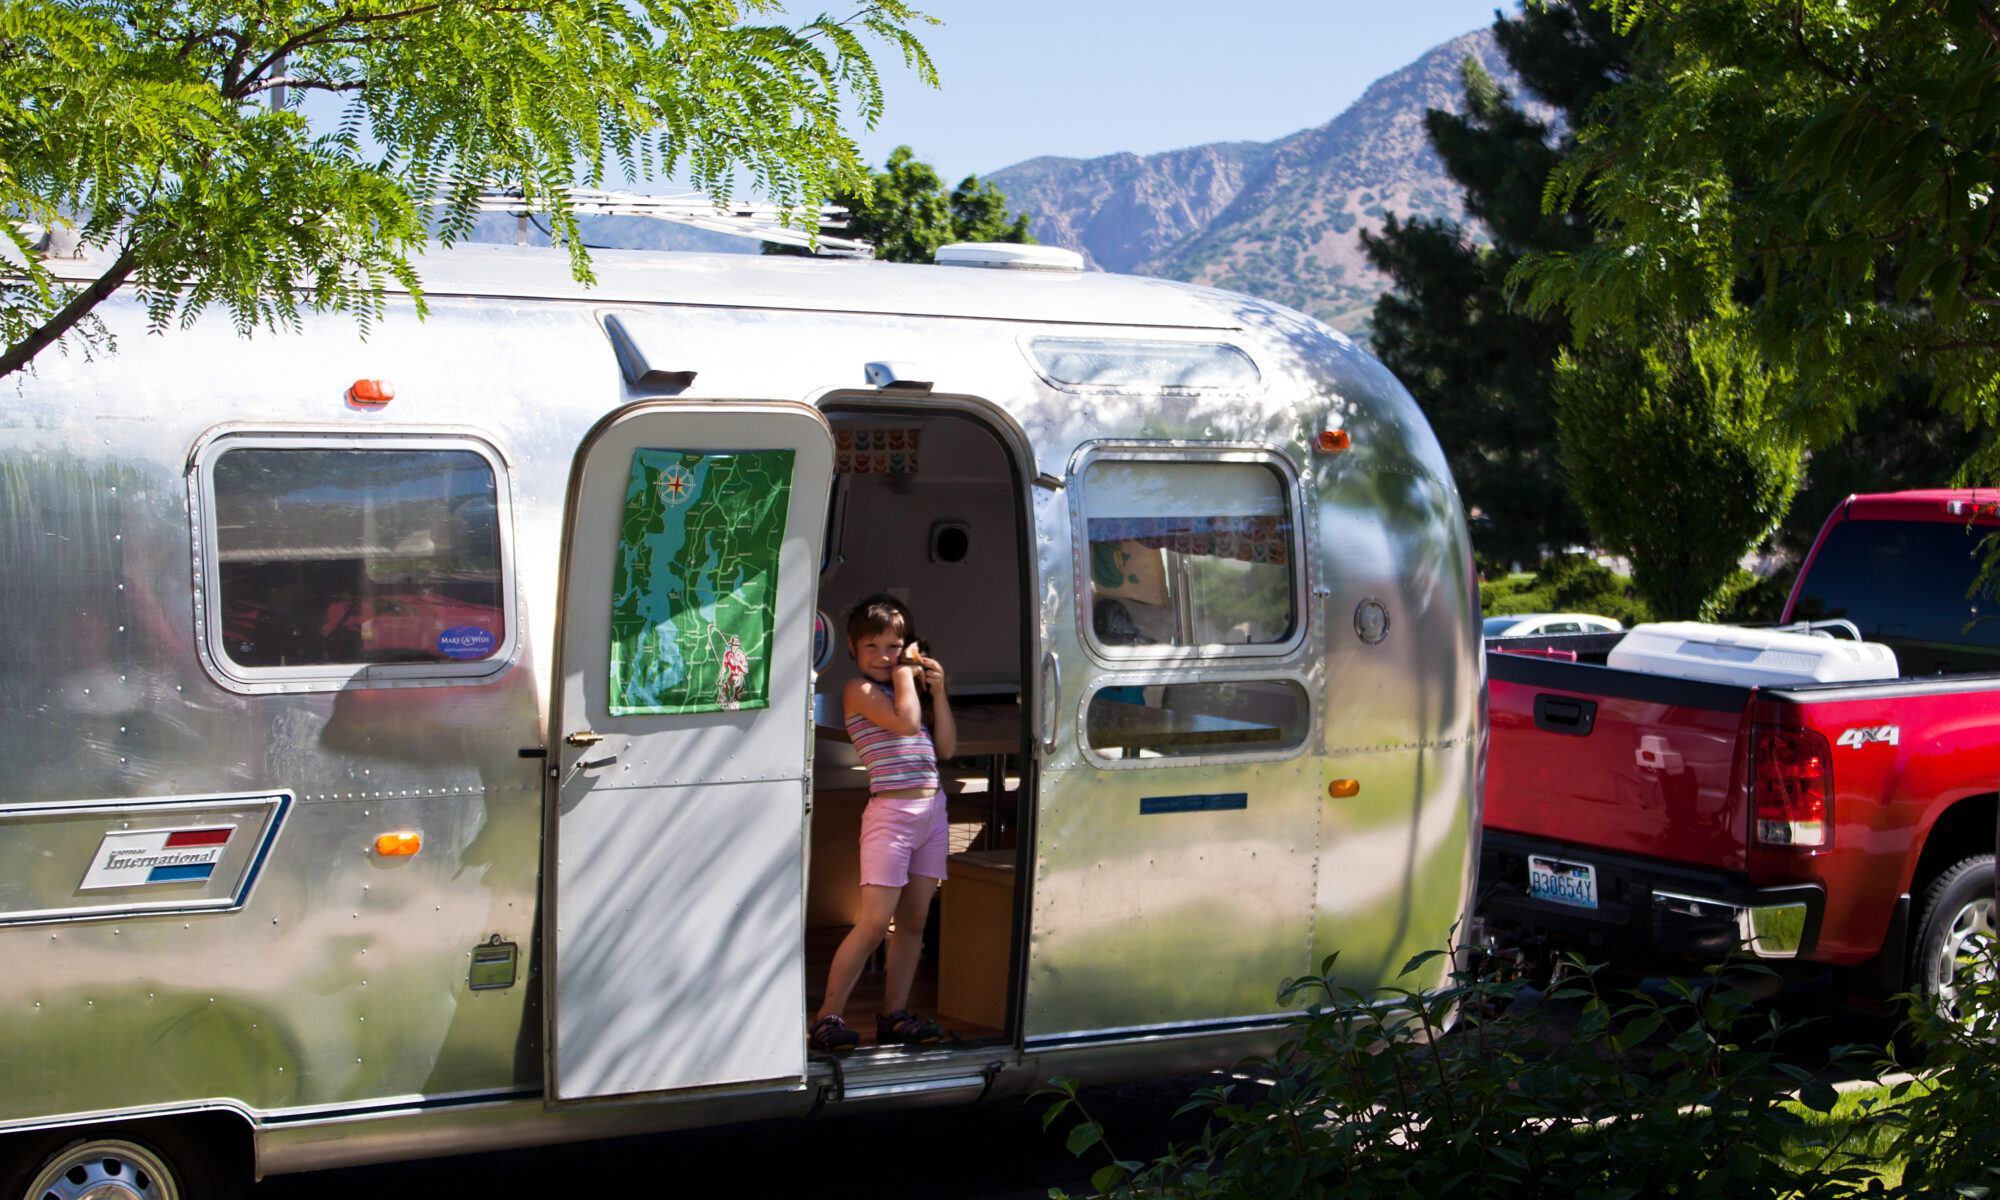
The 31′ Airstream Sovereign International with rear bath is a good length and layout to begin with, to redesign with 4 bunks. We have a large family, so stacking children is saving critical space. Children love the idea of bunk beds anyways; at least ours do. If there are multiple kids in your family, bunks provide them their very own bed instead of having to share a bed. I can tell you from experience, each child having their own bed is a big deal. Sharing a bed for a weekend trip might be ok, but if you’re thinking about a longer stay, the sharing gets old quicker than you’d think. Converting to bunk beds loses the original overhead storage but there are ways to make up for that (such as using the towing vehicle, if it’s a pickup, for a lot of storage). Families with 2 kids could get away with a bath in middle, but that doesn’t allow for friends to tag along.

1972 Airstream Sovereign International Layout
The layout of a 1972 Airstream Sovereign. showing the original twin beds.

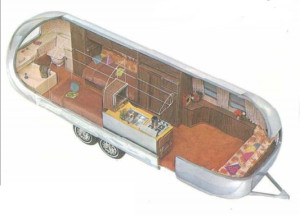
The main reason for not having a rear bath (and instead, have a bedroom in the back) is for a private, always ready parents bedroom. However, that layout puts the kids towards the front and closer to the kitchen. From our month long experience in the Sovereign, the reason a front bed for parents works well is because the parents usually stay up later than kids and the kitchen is in use quite a bit (cleaning up dinner, preparing food for the next day, and most importantly, assembling adult beverages to end the day… all while the kids are sleeping or trying to get to sleep). This becomes a bit more difficult if the kids are sleeping towards the front. There is no greater space separation from the kitchen between the kids sleeping in the front section rather than the middle section. However, it is much more difficult to create a barrier (aka, door) to the kitchen if the kids were to sleep in the front. The front area and kitchen are more of a great room in these Airstreams. When it comes to noise in an Airstream trailer, every inch away from that noise is extremely valuable space and the ability to put in a door is even more valuable. Even though the doors are thin, they do take the edge off the noise being made during kitchen clean up. Also, if the kids slept in the fold out beds in the front, turning on lights to see in the kitchen would intrude in the kids sleep. Ideally, the bunks would be in the very rear with a middle bathroom. That would provide a bit more sound barrier rather than the kids being right next to the kitchen as they are now. Breaking down the dining table for the parents is a pain, but doable. We did it for a month and got pretty quick at it. The one thing we didn’t do as much as we thought we would was eating outside under the awning. Partly because the awning was a big task to set up but also because of the heat, humidity and mosquitoes. If we stayed in a cool place without the viscous, selfish, blood sucking insects, the outside table would be the main table, leaving the option to NOT convert the bed back to a dining table. When we knew we would be gone from the Airstream all day, we left the bed as-is. It all depends on each family’s “laziness” factor. Ours was probably above normal.

Bedding

After spending a month straight in an Airstream with bunk beds, one recommendation we would make is to have the bedding custom sized for that bunk. We used twin sizes and even those were really too big. It made it difficult to really keep the bunks looking kept up because there was so much bulk to the bedding. Custom sizing the bedding is something we need to do to our sleeping arrangements. We suppose sleeping bags would work well, but probably not for a long term solution. One our favorite types of bedding for an RV or Airstream is a nice wool blanket. Not only do they keep a body warm, they aren’t bulky. Bulky items become really exaggerated in cramped spaces. That -20 degree rated Mountain Hardware mountaineering jacket the size of Rhode Island ends up looking like Texas in the closet of a travel trailer (unless you get the pack-able version for $800 more). This applies more so to bedding. That queen sized down comfortable that looks so fluffy on your bed at home all of a sudden becomes a giant space eating monster.

Lighting

With our setup, we have 2 bunks on either side of the isle with only one overhead light to provide the light for all 4 beds. This doesn’t really work well. We would like to add a small separate light for each bed, so one kid can use their light without lighting up the whole “room”.

We have a wide range of ages, so the 12 year old might stay up a bit later reading than the 3 year who is zonked out. The center overhead light has its use, but if a kid isn’t feeling well and needs to have a one-on-one with the puke bowl or change clothes or etc, etc, etc, it would be nice to limit the amount of light emitted on the rest of the clan. Routing the wiring is the challenge for us now, since the bunks are already installed. If you have yet to build out your bunks, we recommend working in the electrical for a light for each bunk in the design. Yes, you could use battery powered LED lights with double stick tape, but replacing the batteries will get to be a pain when it comes to 4 lights and it also doesn’t have that custom built-in look.

Stop Debating

If you’re considering installing bunk beds, we say stop thinking about it and go for it! They look cool, they are very practical and functional and it’s an excellent use of space. Our kids love them and all their friends that see inside the Airstream are completely drawn to them. They are like little forts. They can custom decorate their own bunk space and with the 31′ Sovereign and they each have a part of a window they can look out. Only the bottom bunk can open the window though but that was never a problem, since we used the air conditioner a lot and the windows weren’t allowed to be opened. Unless they wanted the air conditioning police (dad) to take them to air conditioning jail.

So again, this was our evaluation from living in a renovated Airstream that had bunk beds installed. Not everyone might think the same. For some reason, those rear bedrooms are popular. When it comes to privacy for the parents, it definitely provides that. But a well rested child increases the parents chances for better behavior the next day – privacy for the child also has it’s rewards.

Or just throw the kids in a tent outside and call it good.

Making Coffee Using a Moka Pot

This post will be about making coffee using a Moka pot while staying in an RV (or not just any RV, but an Airstream) for a month. I’m not sure I could use a Moka pot full-time so this may not apply to all you full time RV folk, but then again, we were using a hand grinder. The Italians also use it every day, so maybe I’m just lazy and used to flipping a lever. After tweaking this and that to determine the best process of getting some espresso, or as close as we could using the Moka pot, I have set out to document the way I used it. I’m not saying this is the best method at this time, but it worked for us. A Moka pot is a cheap option as well. You can pick them up at Amazon for around $25-40 and they’ll last forever.

Before we left for Miette’s cross-country trip in her vintage Airstream, we were faced with the daunting prospect of leaving the Expobar Brewtus IV espresso machine and Macap M4 grinder at home. Even though we would be left with only 4 square inches of countertop space to work with, we still seriously contemplated taking the setup with us on our travels. Coffee is serious business in this family. To say I’m a coffee snob is being nice. I’m not saying I’m a coffee genius but coffee is something that needs to be done right, each and every time with no exceptions. Preparing the espresso is much easier to do with our day to day equipment. Unfortunately there were some deal killers with taking our equipment:

  1. The Expobar and Macap would double the weight of the Airstream.
  2. We did not have a generator yet so the Expobar and Macap would be nice ornaments when boon-docking off the grid.
  3. We were fearful of the machines falling over and getting tossed around without a sure fire way to secure them in the short time we had to get the Airstream road ready.
  4. There was really no room for them and leaving one child at home to make space was not an option.

Thankfully, some friends lent us their Moka pot and our favorite local small batch roaster, Steve Stoneking of Buzzjoy Coffee Roasting, lent us his hand grinder. This setup worked well but the grinder took some time. We are primarily latte drinkers and were also lent a stove-top steamer, which ended up working reasonably well. Another option we thought of was a french press, but we were worried the glass wouldn’t make it through the trip. A Moka pot is completely durable.

How We Made Coffee In The Moka Pot

Here is the process that worked well for us for making a decent latte.

WARNING: My wife has informed me that the following instructions might seem extremely “geeky” and long. There is the possibility that one could get lost in the geekiness if their passion for making a really good cup o’ joe with the Moka pot isn’t at a very high level. I will provide a more simple set of instructions following the lengthy set.

Assemble the following tools. Have everything out that is needed. Once the process starts, there’s no time to waste to look for everything… that is, if you want it to be an efficient process and be a well-oiled excellent coffee making machine.

  • Moka Pot
  • Hand grinder (like this one if you’re boondocking)
  • Coffee cups
  • Stove-top Steamer
  • Filtered water
  • Gram scale
  • Oven mitt or kitchen towel
  • Small pot that the Moka Pot can sit inside of with water already in it.
  • and of course, good fresh coffee beans.

Grind Setting and Weight

I measured out about 48 grams of beans. Coffee is extremely picky so the weight is very important. I tried 52, 50 and 46 grams… they all had different results. 52 was too slow and I couldn’t get enough liquid. 46 was not enough; there was no crema and it splattered out of the spout and was messy. 48 grams (with the stash of beans we had) came out nice and smooth with good crema. The grind setting was in between an espresso grind and a drip grind but more towards the espresso side. All this is called “tuning” in the beans (finding the correct weight vs. grind setting). As you can see, it took a few attempts to get the beans tuned. When we got a new batch of beans, this had to be done all over. Sometimes we’re lucky and the tune is the same for the next batch. If the next batch is a totally different roaster, expect to have to spend some time tuning in those beans. After weighing your beans, set them in the hand grinder ‘hopper’.

Pre-heat the Water

Make sure the stove-top steamer is filled with enough water (2/3 full is what I had) and put that on high heat.

Leaving the basket to the side, fill the bottom section of the Moka with fresh water up to just below the relief valve and put it on high heat. This is to preheat the water. The idea is that we want this coffee to be as close to an espresso pull as we could get (yes, we are stretching the use of the Moka a bit further than designed). The problem is, Moka pots can’t produce the same pressure as a pump driven espresso machine. Not preheating the water would cause the water to boil up into the grinds and stay there longer and be a slower brew. My thinking is that I want a fast, high pressure brew to mimic an espresso extraction as much as possible. So bring the water to a small boil first and then turn off the heat.

Moka Pot Coffee Espresso Latte Airstream
Preheat the water in the Moka pot and the steamer while grinding the beans.

Manual Labor (Grinding)

While the water is heating up, start to grind the beans with the hand grinder. The time it takes to grind the 48 grams of beans by hand is about the same time it takes to boil the water and for the steamer to have built up enough steam to get a good milk roll. This is a very manual process and your arms will probably get tired. Unless you are Clark Kent. Or Batman; I’m sure Batman wouldn’t get tired. Or Chuck Norris. Actually, Chuck Norris just uses his fist to grind the beans. You can try grinding the beans with your fist, but you’re not Chuck Norris so I don’t recommend it. The grinding and heating the water should all be completed around the same time. If the water starts to boil before the grinding is done, turn off the heat. NOTE: Do not use an electric blade grinder. It’s tempting because of the time it saves. The hand grinder is a conical burr grinder and will give you way better grain consistency which is absolutely key to making good coffee. I’m serious; don’t use a blade grinder. If you do I will have Chuck Norris make sure it never happens again.

Moka Pot Coffee Espresso Latte Airstream
Grinding by hand takes a bit of time. Talk about ‘hand crafted’…

Properly Filling the Basket

Once the grinding is done, begin to fill the basket with the grinds. This part is a bit tricky and requires a bit of ‘feel’. What I did was fill the basket about half full and then lightly tap the basket on the counter to compact the grinds ever so slightly. I did this a couple more times till all the grinds were in the basket. Fill, tap a little. Fill, tap a little. I didn’t tamp the coffee down with my finger till all the grinds were in the basket and even then, I lightly tamped, just to flatten out the mound and squish it down a bit – the basket should be full. Compacting the grinds too hard will prevent the water from being able to push through (at 48 grams) the grinds and up into the spout. Not tamping enough won’t let the grinds all fit in the basket. Again, we’re trying to push the limits of the Moka pot and produce some decent pressure through the basket. There’s a perfect balance somewhere in there between the fineness of the grind, the amount of beans and the compactness of the beans. I was constantly trying to find this balance. Sometimes I did, sometimes I didn’t. Each time using the Moka pot was a lesson for the next time.

Moka Pot Coffee Espresso Latte Airstream
FIll the basket with the grinds a bit, then lightly tap the basket on the table to settle the grinds. Do this only 2 or 3 times.

Assemble the Pot

When the basket is prepared, set it inside the bottom container of the moka pot. Take the upper pot and start to screw it on and do this enough until you can lift up the whole thing off the burner. Grab a kitchen towel or oven mitt so you can hold the bottom of the moka pot while tightening down the top portion. Make sure its nice and tight, otherwise the pressure will squeeze water through the threaded seam of the pot.

Begin the Extraction Process!

Moka Pot Coffee Espresso Latte Airstream
Keep the lid open so you can see how to the coffee is coming out. Think of this as pulling with a naked portafilter… except its a Moka Pot with the lid open.

Put the Moka pot back on the heat. Set the heat on high. Remember, we preheated the water so it will only take a couple minutes at this point. You should start to see some nice crema slowly coming out of the spout. It will slowly change to a more dark coffee flow. I was only able to get enough coffee to make it about 1/4 – 1/3 up the spout.

This is about 3.5 ounces… just barely enough for two lattes (is there a such thing as a Moka ristretto?). This is OK for us because this coffee is going to be a bit stronger than a normal Moka pot of coffee… which is what we want :). We also don’t use much milk in our latte’s. If you use this method for a 12 or 16 ounce latte it will taste weak… ya know, like most espresso stands make.

Moka Pot Coffee Espresso Latte Airstream
Putting the pot in a pot of tap water will stop the extraction process.

When the coffee starts sputtering out of the spout a bit and the flow becomes inconsistent, it’s time to remove the Moka pot from heat and quickly set it in a pot of water.

This will stop the extraction process and stop the “pull” of espresso by quickly cooling the water remaining inside. Letting it continue would be similar to continuing to pull an espresso shot after all the good flavor has been extracted. Letting it continue will begin to extract the undesired flavors of the coffee. Note: If bad flavor is the desired result, please see the more simple and quick tutorial at the end of the page.

Build Your Coffee Drink

Depending on how you like to drink your espresso, now you can prepare your drink to your liking.

Moka Pot Coffee Espresso Latte Airstream
By the time the coffee is done, the steamer should be ready to steam the milk… if you want a latte that is. I did.

Here are more simple instructions for those who just need some dark colored water that resembles coffee:

  1. Acquire some pre-ground coffee. Preferrably the coffee that was roasted 5 years ago.
  2. Put pre-ground coffee in basket.
  3. Assemble Moka Pot with water filled up to pressure valve.
  4. Put Moka on high heat until brownish water starts splashing out of the spout.
  5. Pour coffee into mug, pretend you like it.

From Yellowstone to Home

Well, a week ago today we left Yellowstone and headed home to Washington state and wrapped up our (almost) month long trip across the country that came about with Miette trying to figure out what she wanted to do for her Make-A-Wish. She didn’t want to do Disney World or Disney Land. She said she “couldn’t keep it” so the idea of going to see  “Mee-maw” (her grandma) morphed and changed form until it finally ended in an Airstream (which she could keep) and a cross country trip.

Something About Those Airstreams

We woke in the morning, around 5:30am. The girls were eager to get an early start so we would make it home in time to see their good friends who lived across the street. They were scheduled to depart on a 2 week trip of their own the following morning. It takes a while for us to get completely ready to roll, so, after coffee, we were heading out of the Fishing Bridge RV Park at 7:30am. Low and behold there was a fellow Airstreamer leaving the park as well – first one we saw in Yellowstone. They waved to us with a thumbs up, we waved back. They turned left, we turned right.

Fishing Bridge RV Park in Yellowstone National Park
Looking down the row of non-Airstreams.

For some reason, its always cool to see another Airstream. Maybe its because we saw about 13,924 white boxed travel trailers on our trip and only a dozen Airstreams.  It’s refreshing to see that glimmer (sometimes a blinding glare) of the silver when looking down the row of standard RV’s. Not trying to knock those without an Airstream; I understand Airstreams are expensive and it really limits who can acquire one. However, vintage Airstream’s are out there for the same price, and most of the time less, than newer model white box trailers. The vintage Airstreams may not have all the latest greatest bells and whistles, but they last longer and provide that satisfaction of not blending in. But then again, some people don’t mind blending in… to each their own. I personally didn’t like travel trailers at all – but Airstreams, now those just are just cool looking and provide enough nostalgia for me to put down my backcountry pack (for a bit) and pick up the hitch. But I digress…

Fishing Bridge RV Park in Yellowstone National Park
It was the most trees we’ve seen in an RV park by far

Back to our day

On our way out we saw a large herd of bison in the Hayden Valley and a few more that were still laying in the grassy spots. A couple were walking along the white fog line of the road, close enough to force us to slow almost to a stop in order to get by in case they decided the crosswalk was right where they were standing. We were heading north to leave Yellowstone through Mammoth Hot Springs area and the northern entrance. We made a quick potty stop (already) at Roaring Mountain, showed the Airstream to an interested elderly French couple and took off, pushing the pedal hard (until reaching 35mph).

Roaring Mountain in Yellowstone National Park
Yellowstone is the only place that I won’t touch the streams 🙂

The north entrance has its coolness with the Golden Gate and the Terraces and is probably more interesting than the eastern entrance inside the park; but when it comes to approaching Yellowstone, the eastern way still takes the cake.

We freaked out a little going through the Golden Gate and boulder field just after, hoping there wouldn’t be an oncoming tour bus. We dropped down into the small summer city of Mammoth Hot Springs and saw a herd of elk cooling off in the shade 10 feet off the main road/parking lot. We then dropped further down, leaving Wyoming, entering Montana into Gardiner. Of course we did meet a tour bus exactly at the bend at the Roosevelt Arch – we survived.

Once we left the park, a couple of the kooks fell asleep so we were off and running for the next couple hours, passing by a couple Airstreams within minutes of each other. This day was the day we saw the most Airstreams in one day. Maybe it was National Use Your Airstream on Friday Day? In total, we saw about 6 Airstreams that day. One of Miette’s favorite things to do was to keep an eye out for any Airstreams. When someone spotted one it went like this:

Person 1: “AIRSTREAM!! THERE!!” (Pointing off into the far distance)
The others: “WHERE?? WHERE??”
Person 1: “Over there!” (still pointing off into the distance)
The others: “WHEEEERE???”
Person 1: “THERE!!” (pointing to the Airstream that was now passing by)
The others: “Oooooo, coooooooool!”

Lunch and Beyond

Once child #3 and child #4 awoke, it was time to stop for lunch, fuel and coffee. We ate at Joe’s Pasty Shop in Butte, Montana. The staff was extremely nice and helpful and the food was good. If you’re stopping in Butte for lunch, check out Joe’s Pasty Shop. However, if you’re stopping in Butte for coffee, don’t expect much. The place we stopped at (I won’t mention any names like Florence Coffee Company) pulled our shots just shy of 10 seconds. Oh well, it’s maintenance coffee at this point, even though there is no way enough caffeine is going to get extracted in 10 seconds.

On our way towards Idaho, we finally passed an Airstream heading in the same direction as us, for the first time. It was a 34 foot Excella (three axles). Man, that thing was long; once we started passing, it took us a couple hours to finish. We waved with happy faces as we passed the towing vehicle, only to be greeted by what looked like a grumpy old man who didn’t wave back. Umph. Well, nevermind then.

We encountered a forest fire on a mountain just off the freeway near the Idaho-Montana border and saw multiple helicopters dropping water on it: very cool to see the helicopters but I’m sure the homeowners close by weren’t thinking the fire was too neat. After that, we stopped to fuel up. At this exit we saw what looked like another Airstream in a free overnight parking area (turned out to be an Avion). Low and behold, Mr. Grumpy Pants also pulled into the same parking lot with the Excella. We waved again, giving it one more chance.This time he gave a small little wave back. We’ll take it, I guess. We were guessing he was just transporting that behemoth and not actually an Airstream owner. Maybe he was grumpy because he had to haul a football field length Airstream?

The rest of the trip home was the typical drive from northern Idaho to home. We passed by Sacred Heart Children’s Hospital where Miette did treatment. She did her “thhhhhhhhbbbbpppppppptttt!” at the building as we passed. As parents, we have mixed emotions on that place. There are a lot of children suffering on that oncology floor (and other floors as well). We are thankful Miette is no longer a part time resident there but its also tough to not think about the others there. They treated us well there. The “thhbbpptt!” is more directed to cancer in general.

The Close Out

In closing out this trip journal, we’ll say overall it was a great experience. Obviously, as a family of 6 there were times when personalities made things difficult. The travel days were long but overall the kids did really great. We passed up a lot of sights that we would have loved to stop at. Unfortunately time was not on our side. A word of advice for those seeking to do a cross country travel trailer trip: take more than a month. One month was not enough at all. There are things you don’t realize are out there. If you’re planning it all out, I’m afraid your plans will be left at a rest stop on the second or third day.

Even though we all had great fun on this trip, we all agree on this: We would give this whole thing up; the Airstream, the trip, the sights, the experiences… we would give it all up without batting an eye, if it meant Miette didn’t have to go through what she went through in 2012. So the lesson is this for all those with young families, as we should have learned before: don’t wait till something horrific happens to your family to determine you need to spend more time as a family in adventures like this. The world will not fall apart if you decide to go a huge trip like this – it actually keeps turning.

So get your maps out, get your gear ready and do it now!

Yellowstone National Park

Yellowstone National Park was our destination when we awoke in Rapid City, South Dakota on Wednesday morning. We were hoping to be there around 6pm, time enough to have dinner and enjoy the cool mountain weather.  But then the Buckhorns jumped in our path, distracted us, and slowed us down considerably.

Buckhorn Mountains with the AIrstream
Approaching the Buckhorn Mountains from the east

Then, along came the little town of Cody, named after the American West legend, Buffalo Bill Cody, and had us open-mouthed again.  About thirty seconds after leaving Cody, when we were ready to buckle down and hit the road hard to make up for some lost time, along came the cliffs of Cedar Mountain and the deep gorge that is just below Buffalo Bill Dam. The gorge was only visible for a brief second or two before the road headed into a long tunnel but those two seconds were very captivating.  Wyoming teases its travelers. We sat on a flat road, through a mix of fields and sage brush and then BAM! A deep gorge and towering cliiffs. Unfortunately, there was no time to get photos and turning around with a 31′ Airstream isn’t something easily achieved with us rookies.


So we kept going on Highway 14. More distractions were in store as now we could see the beginnings of mountains. Big mountains. And what’s that? A wide shallow mountain river wandering through the valley floor? Are those fly fisherman? (Indy, put your head back in the window).  Are those gigantic beautiful log lodges and cabins on huge ranches with pine trees and meadows? The Shoshone River Valley is one of the most beautiful valleys ever designed. Washington State has some pretty impressive valleys in and around the Cascades and Olympics, so for all those north-westerners who haven’t seen the Shoshone River valley, that’s saying something. The mountains on either side of the river grew taller and taller and the road slowly gained in elevation the closer we got to Yellowstone.  We highly recommend taking this route into Yellowstone (unfortunately there was a certain girl who didn’t notice any of it due to some Nancy Drew books). The disease of MGTN (Must Get There Now) prevented photos from being taken. It was painful to not stop. Indy, the fly fisherman in training, moaned at each bridge crossing the river. The fear was that if we stopped, we would not want to continue on. Could it get better than this?

Umm… yes.

Finally, Yellowstone National Park

We arrived at the Yellowstone National Park entrance at last! After forking over $25, we immediately started climbing in elevation. Up and up and up and up through switchbacks and curves… all at 35 mph. One thing to remember: it takes a long time to drive distances in Yellowstone. Top speed is 45 mph (the sign said “45 means 45”). The road finally crested at the tree line and in the rocks beside Hoyt Peak and we started down towards Yellowstone Lake. The eerie remains of the 1988 fires were all around us at this point. Huge swaths of blackened sticks still remain, even 25 years later. I (Kelly) remember the fires vividly as our church youth group took a trip to Yellowstone that year. I remember seeing the smoke billowing from behind the hill as we looked on the Old Faithful geyser and then large flares a 1/4 mile off the road on our way back towards Jackson Hole.

We saw our first wildlife just before coming up to Yellowstone Lake. There were two bison standing in a small patch of grass. They were dark, still as a statue and almost looked fake. They weren’t eating or grazing, just standing still. Miette was excited! She loved getting to pet the bison at Lake Tobias Wildlife Park in Pennsylvania and this was feeding her passion even more.

Yellowstone Lake Summer Clouds in Yellowstone National Park
There were clouds moving through, close to sunset over Yellowstone Lake.

We stopped at the lake to finally take a photo since the clouds were SCREAMING for some photography to be performed. We were at Fishing Bridge RV Park a few minutes later. After a little mix up with our reservations in which Steve, the reservations guru on staff, fixed for us (thanks Steve!), we were setting up “camp”. This place was more of a temporary city than an RV Park. We pulled the Airstream through what looked and sounded like a street party. Nonetheless, we arrived, were tired and happy to be in Yellowstone.

The next day we awoke, had coffee from the Moka Pot using beans from Capitol Grounds in Montpelier (we were in a desperate search of beans in Vermont and finally found a local roaster) and spent a full day making the rounds inside the park. We first stopped at the West Thumb Geyser Basin, where Brier discovered that walking backwards on the boardwalk almost the entire time was fun (and slow). He did this for the rest of the day whenever a boardwalk presented itself.

Walking Backwards at West Thumb Geyser Basin in Yellowstone National Park
He is walking away from the camera, not towards

From there we headed north through the Continental Divide and made a quick stop at Kepler Cascades before dropping down into the Old Faithful complex. We ate at Old Faithful and waited what seemed like a really long time for the geyser to go (it was “late” by 25 minutes). It was amazing to see the amount of people that gather for that show. After some ice cream, we started heading further north with the intent to get to a place where there’s a swimming hole (somewhere around Firehole Falls – but we weren’t sure where). Brier crashed and so we took a side track to the Great Fountain Geyser so he could sleep a little longer before needing to get out of the truck. We waited 30 minutes for a smaller geyser to go off and then continued towards Firehole Falls. We ended up finding the beautiful swimming hole on a one way drive off the road. The kids loved it! It was not too deep for the kids and they spent a little over an hour swimming and enjoying themselves. A perfect natural outdoor pool.

Firehole Falls swimming hole in Yellowstone National Park
A swimming hole near Firehole Falls

From there we quickly (46mph) headed east to the “Canyon”  for a quick peek at the lower waterfall. We debated whether a bird we saw (the size of a dot) sitting way out on a rock formation was a bald eagle or osprey. We agreed on it being a bald eagle since it would be a better story to tell. After that we started the last leg south towards the RV park around 7 PM. The goal at the beginning of the day was to hit this section (the Hayden Valley) around evening time to increase our chances of seeing wildlife.  We saw a lot of bison, some up close, and Miette was ecstatic! She was counting them and lost track around 40 or 50. We never did see any moose, which Esme was really craving to see. We made another quick stop at the Mud Volcano. As I told Indy and Esme, I’ll tell you all as well: if you ever had the strange desire to let out a toot with a whole bunch of people around, do it at the Mud Volcano since it already smells like that. No one will EVER know it was you and you can walk around giggling to yourself, knowing what you just did and that no one has any clue about it. But I digress. We arrived back at the Airstream for some leftover chicken Caesar salad. It was a very busy day at Yellowstone National Park but worth every single one of the $25 entrance fee.

I’ll finish up Friday’s travels in the next post so stay tuned. Here are some photos from Thursday though.

Yellowstone… But First The Buckhorns.

Our day Wednesday seemed extra long for whatever reason in our mad dash for Yellowstone. We started off by hightailing it out of MIrror Lake State Park in Wisconsin Dells, heading north on I-90 towards Minnesota (Indy tried fly fishing in this lake, only to realize it really should have been called Algae or Swamp Lake State Park). The park itself was decent but the RV sites had shared driveways. They had plenty of room to spread out the sites more than they did. No matter, we were only there overnight.

Airstream Air Conditioning
Miette was enjoying the air conditioning much better than the humidity from Ohio the night before.

We stopped at La Crosse to stock up on some food, eat breakfast and fuel up. The truck was getting about 11-12 mpg the entire trip.  The goal was to try and fill up every 250 miles or so assuming there would be a place to do so – about every 3.5 hours. This would also be the time to stretch, snack/eat and use the restroom. When the traveling days are 10-11 hours, minimizing the stops are critical to prevent the day from heading into the “insanity” level. One thing we learned on this trip: when going across the country, a family needs more than a month. Driving 10-11 hours each traveling day was not ideal since the actual time, including stops, was 13-14 hours. That’s too long and we knew it but didn’t really have a choice since time was against us. Unfortunately there were a lot of sights we had to pass up due to this time crunch. Museums, landmarks, geological sites, etc. As an example, on Wednesday we entered South Dakota with the the intent to sleep over in Rapid City. We had to make it to Rapid City in order to make the next days goal of getting to Yellowstone a reality. This resulted in us passing through Badlands National Park in the dark. We got a tiny little glimpse before it was real dark and really wanted to stop and see it. Even more so after spending all day through the flats of southern Minnesota and eastern South Dakota. Finally the geography was getting interesting just as it got dark. Sigh.

Regardless, we made it to Rapid City by 10:30pm. We stayed at the Lake Park Campground. This place was more like an RV park than a campground. The office people were very nice, the restrooms were very clean and it wasn’t a huge place, so overall it was a pleasant place to spend our 10 hours of rest. They weren’t any more pricey than the other RV Parks/campgrounds. For those staying more than a night at Rapid City, Lake Park had a nice location close to the lake: paddle boats, swimming and fishing. We, however, had a date with Yellowstone and needed to get going in the morning, which we did. We headed off into the Black Hills of South Dakota and eastern Wyoming. It was good to see pine trees and rolling hills/mountains again. Ever since leaving Highway 7 in Vermont, the geography of the I-90 route struggled to gain our attention much (we unfortunately were driving next to Lake Erie in the dark), with the exception of crossing over the Mississippi River and heading into the Minnesota. That was a decent 30 minutes.

Once we were through the Black Hills, we dropped down into Sheridan where we grabbed a bite to eat and fuel up. Dropping out of the Black Hills presented us with a nice view of the Buckhorn Mountains off in the distance. Before hitting Sheridan, there were signs saying how Highway 16 was a much better drive over the Buckhorn Mountains than our planned Highway 14. The signs said the scenery was better, the grade was less and it was a safer road. We stuck to Highway 14. Even though we have no idea what Highway 16 was like, we couldn’t imagine anything being a better scenic drive than Highway 14. Needless to say, we loved Highway 14 through the Buckhorns. To sum up that drive in 5 words or less: Wow.

The Buckhorns immediately presented us with a steep climb. We figured the road would go around some mountains and up some valley floors and find the lowest path into the range. Nope. The road tackles the first large mountain it comes against. Up, up, up and up we went. Think Cabbage Hill but no freeway, 3 times longer, way more curvy and definitely slower.

Buckhorn Mountains with the Airstream heading to Yellowstone
Looking down into eastern Wyoming from the Buckhorns.

Every switchback revealed a tremendous view of the eastern Wyoming. The elevation we were at made the Black Hills look like the plains of Illinois. Of course, Miette was a bit nervous looking down and may have been reconsidering her choice of going across the country at this time. Once the road began to level out, we found ourselves in a national forest with mountain meadows galore, rock formations, alpine lakes and free range cattle and sheep (and needing to suddenly stop for a sheep)… and very narrow road. The driver (Kelly) was tempted all through this drive with the sights screaming at him to take his eyes off the road. After about 30 minutes of pretty level roads, the route began to drop down the other side of the Buckhorns. As steep as the climb up was, the downward path was the same.

Buckhorn Mountains on the way to Yellowstone
Looking north out across northeastern Wyoming from the edge of the Buckhorn Mountains.

The scenery changed extremely fast from green forests and meadows to dry, rocky terrain. It was still beautiful though. The towering cliffs were dominating the view and was very impressive to the eye. The road went down a valley that a road probably shouldn’t go down.

Buckhorn Mountains
The Cliffs of the eastern Buckhorns

Cliffs on one side, stream next to the road on the other side and cliffs hanging over that stream. We were able to stop and grab some photos but the time thing was still against us. We never knew the Buckhorn Mountains existed. We do now. If anyone is ever going to go to Yellowstone from the east, take Highway 14 from I-90 over the Buckhorns… you will not be disappointed. I wouldn’t even hesitate to recommend those coming in from the west to make a longer trip into Yellowstone and catch the Buckhorns on the way in.

The Buckhorns were just the beginning of the geographical eye candy. The next post will explain our route after coming out of the Buckhorns and heading into Yellowstone, including our time there.

Leaving Vermont and Starting the Trek Back Home

We started our trek back home, leaving Vermont yesterday, after gathering our endless scattered belongings from Aunt Karen’s house, saying our goodbyes, loading up and making our way down Highway 7 towards Albany. The day started reasonably enough, but we quickly ran into a long traffic backup in Albany, getting onto I-90 (known to New Yorkers as the Thruway). Once we past that, we were making decent time. We knew it was going to be a long travel day; our goal was to make it to the other side of Cleveland. We arrived in Avon, Ohio around 11:30 pm, pulling into the local Wal-mart. Again, under construction.  There appears to be a nationwide WalMart expansion.  Be afraid, people.

This was the beginning of an excruciatingly long night. It was 76 degrees outside and the wind was not blowing at all. Inside the “Silver Oven,” it had to be at LEAST 90 degrees.  I bet these Airstreams are great in the winter for staying warm.  We pretended to sleep for a long time, but despite a pathetic little 12 volt Wal-mart fan teasing us with hints of a slight warm breeze, we were each stewing in our own juices. We admitted defeat around 2:30 AM. Smart phones to the rescue. Red Roof, $66 and 45 minutes later we were all lying in a cool hotel room. Unfortunately, the adrenaline of hurriedly trying to get the family to a cool place (and sipping on iced tea since Erie, PA), Kelly ended up not sleeping at all. But time doesn’t wait for anyone and the morning came real fast; so off we went. We cruised through northern Ohio and then snaking our way through the Chicago badlands (aka, the toll freeway system – we lost count how many times we paid $2.25 cash money). After the 62 miles of narrow lanes and heavy construction we made it to Wisconsin. There are two states that should fire their entire DOT staff. Pennsylvania and Wisconsin. Wow, Wisconsin roads are bad (but at least we didn’t have to pay to drive on the bad roads like we did in PA). Right now, we find ourselves in a campground just outside of Wisconsin Dells with the AC blowing cold… with time in the evening to roast a chicken. We’re not exactly sure how the family next to us is tenting in 82 degrees, 70% humidity and with giant, hawk size mosquitoes of prey. Us northwesterners must be humidity whimps. Yes, that’s exactly what we are. Give us the 8,000 feet up a northwest trail, cold temps at night and zero mosquitoes over a hot and humid Wal-mart outing any day.

Sorry, no photographs today. There isn’t much time for photos when we are busting our behinds trying to make good time. Our plan to is to hit Yellowstone on Thursday so stay tuned for some excellent media over the weekend.

Visiting Montpelier and Vintage Trailer Supply

Soo, we were off this morning about 9:30 AM (no small feat) to take a short trip to Montpelier, Vermont, which is pronounced mont-PEEL-ee-er, by the way.  I (Lisa) can’t get the French pronunciation* out of my head and Mont-PEEL-ier sounds like a cheesy English way of saying it.  We were headed to Montpelier on a specific mission; to meet and thank the crew at Vintage Trailer Supply for their thoughtfulness in providing parts and decor for the Airstream.  That great dishtowel map of Puget Sound on our Airstream door is courtesy of Steve and crew at Vintage Trailer Supply.

But first, lets take Route 100 and stop off at the Warren Country Store.  There’s a charming saying in Vermont that my sister has made me aware of:  “You can’t get there from here.”  Meaning navigation of the Vermont infrastructure is challenging.  Route 100 is under serious construction and we spent much of the time in stop and go traffic on gravel.  The Warren Country Store was wonderful, albeit pricey, with a plethora of organic, artisanal goodies, handmade or hand-grown by locals.  Upstairs, Esme gasped at the price-tag on a small leather purse she spotted – $138.00.  One of the conquests of the Warren Country store was a four-pack of elusive “Heady Topper” beer; also known as the Beer Advocate’s #3 beer on the list of Top 100 Beers of the World.  With our prize in tow, we left for Montpelier.

We pulled into Vintage Trailer Supply later than expected (shockingly) and got to spend a good half hour with the crew.  Thank you, Steve, Mark, Mike and lovely lady who’s name escapes us, for being quite gracious to the 7 kids who were quite antsy from the drive.  We talked plumbing and poop with Steve, the owner and mastermind behind VTS and chatted with Mark, the parts guy, about his kiddo’s fight with leukemia 14 years ago.  Mark’s son was also a Make-a-Wish kid, so he knew that journey all too well.

We romped around Montpelier and ended up on the capitol lawn, picking squash and basil from the vegetable gardens that grace the front entrance.  Vermonters, please go harvest from your capitol gardens— there is Swiss chard in abundance, patty pan squash ripening, peas are on, herbs galore and more.  We took a more direct, less arduous route back home and after a quick Sabbath dinner on Karen’s screened in front porch, hurried kids off to bed.  Oh, one lovely note…  Karen’s neighbor across the street has built an impressive brick, wood-fired bread oven and has been gifting us glorious loaves of bread during our stay.  Today’s variety was rosemary/olive oil.

A Special Video Treat

This is a special post for us. Miette does not like to be photographed that much nor does she like to be videotaped. However, upon cleaning out our digital video recorder this evening we came across a video Miette took of herself. We thought we would share this, since to us it’s like finding gold. Just don’t tell Miette we are posting this! This was the day after her guinea pig, Tina Turner, unexpectedly died.  “I am a famous singer but I am also a famous pet owner.”

Meanwhile, we have spent most of this Vermont trip relaxing and enjoying the company of cousins; even with the relentless barrage of mosquitoes. Its interesting to see the dynamics of who hangs out with who. Miette is reveling in her cousin Emma’s extroverted personality.  Indy and Carter spend time together, then go their own ways; Indy sneaking off to fly fish, as we are in the backyard of the Orvis company.  They are very similar critters, those two.  Esme is collecting hardback Nancy Drew books, haunting the thrift shops of these little Vermont towns.  Signing off to get some shut eye— busy day tomorrow, with a field trip to Montpelier on the agenda.


Patient Invested Physicians

We were in a good position in a sense that we were friends with a doctor.  He knew her, was close to her, cared for her and was invested in her more than any other doctor Miette would end up seeing. I believe that’s one of the real downfalls to modern medicine: patient investment. We read too many studies and heard of too many stories about children dying from treatment. Most of the time the pediatric physicians aren’t present when the death occurs even though they were in the office. The children just become a statistic at that point. When the child dies, the doctor has to separate themselves from that death. How else could doctors keep doing what they do, after seeing death after death? They would become even more numb to deaths more than they already are. But that’s the real issue; maybe they shouldn’t separate themselves? They are dealing with life and death. I don’t want our daughter’s doctors to have a barrier between Miette and themselves since potentially harmful decisions about her health become easier to make. Just give her this drug to counter that side effect. Wait, wait, wait… if there was a real investment in Miette, like Dr. Cocheba had, would that drug get prescribed?? Maybe an extra 15 minutes of anxiously considering our daughter and their dear friend would show that decision to be unwise after all. But one could say that if doctors were closer to their patients and didn’t protect themselves from death after death by putting up a barrier, then they eventually would quit from the personal turmoil or depression. I say maybe that’s not a bad thing. Maybe there are too many physicians? Maybe less physicians with greater investment in their patients would equate to a healthier society and in turn, less death. The old “quality over quantity” argument. The way it is now, most of the time the doctor administers over a treatment and if that treatment results in a death, the parents are left to clean up the traumatic and chaotic mess. The doctor goes home and has dinner with their family, watches a sitcom and goes to sleep, while their patients family is left with a huge irreplaceable void. If the doctor was invested, they would be there when the death happens, be outrageously concerned as any friend or family member would and be traumatized as much. Then, the next time the same decision must be made with another patient, they might remember the pain they felt, dig a little deeper for a different treatment rather than giving the same treatment. I guess the term that comes to mind is “trigger happy”. Because of this lack of personal patient investment, its way to easy to just press whatever button the book calls for. Maybe we’re ignorant to it, maybe they disguise it really well, but it doesn’t appear a physician has enough pain when their patient suffers catastrophic results from their prescribed treatment.

Back to having a personal friend as a physician, we could bounce things off him and get a very real and honest first, second or third opinion. We knew it would be a quality opinion, regardless of personal beliefs of medicine (allopathic vs. naturopathic) because if the opinion was a bad one and we acted on it, he couldn’t escape the outcome of that opinion. Again, I would assume it’s a very heavy burden to carry as a physician when handing out healthcare advice to friends and family. It would take a very special person to become and to stay a physician.

When a parent’s child is newly diagnosed with cancer, finding a quality pediatric oncology physician, one who is willing to invest in that child is extremely difficult. Don’t get me wrong, Miette had a good oncologist. She was cooperative with the natural treatments from our naturopath and didn’t discourage or put up a fuss about it. She didn’t get bent out of shape when we did research and questioned prescriptions and treatments rather than just “going with the flow”. But she wasn’t invested. The only time we saw her was the 10-15 minute checkup each day during treatment. A doctor just can’t become invested like that. Most children’s hospitals are jam packed and the oncologists just don’t have time to get invested. Again, this gets back to quality vs quantity. If you find a doctor like ours, then you’ve done well. If you find a doctor like Dr. Cocheba, a personal friend, then you’re in a very good position. One thing to always remember as a parent with a child going through this horrible disease (or any other disease requiring heavy use of the medical industry); you, as the parent(s), are that child’s defender. They are essentially helpless in the medical world and are depending on you to make the best decisions. If the oncologist you have isn’t a good fit, your child will either not know it or not know how to express that something is wrong. It’s up to you as the parent to be able to tell what is working for your child’s health based off a number of factors. It takes a lot of time, hard work, research and oversight of everything going on. Physician is a profession. There are those who are good at it but don’t forget there are those who are BAD at it, just like mechanics, financial advisers, police officers, teachers, scientists, engineers, etc. There are those who are not good at their profession. Not everyone who is a physician should be a physician and its up to the parents to come to that realization (and not be afraid to come to that realization) and act accordingly; the young child just can’t.

We assembled a team of physicians that we were, at the least, very comfortable with (Miette’s nutrition physician, Dr. Donovan was at The UHC in Seattle – nutrition isn’t something the allopathic world knows much about). It wasn’t perfect though, primarily due to geographical distance. We weren’t comfortable with the initial team, which is another post for another day.

Out With PA, In With Vermont

The day started with coffee (of course), packing up the Airstream and the crew, performing the always delightful tank dumping (sorry, no photos), saying our goodbyes to the PA family and hitting the road once again in the Airstreaming fashion.

Miette and Emma each with their own birthday cake. Yes, you do see a giant rooster in the photo.

We arrived in Vermont this evening after a leisurely stroll through northern Pennsylvania, middle New York and the western edge of the Vermont countryside. We arrived in Wallingford. I think there’s a Wallingford in every state. This one is a little version so far. This Wallingford also had a birthday cake waiting for Miette and one for her cousins since their birthdays are close together.

An update on the coffee situation: We have been able to use our old Rancilio Silvia espresso machine and Rancilio Rocky grinder while in Oakland Mills but now must revert back to the Moka Pot and the hand crank conical burr grinder. I’m not entirely upset since the Moka Pot is another coffee skill that needs to be added. Maybe I’ll try and make a how-to blog post on the Moka Pot. It would fall under our “Natural Family Living” category of course, since coffee is, well, natural. Snapped some photos of Vermont and the towing rig windshield setup. Off to bed…

%d bloggers like this: